
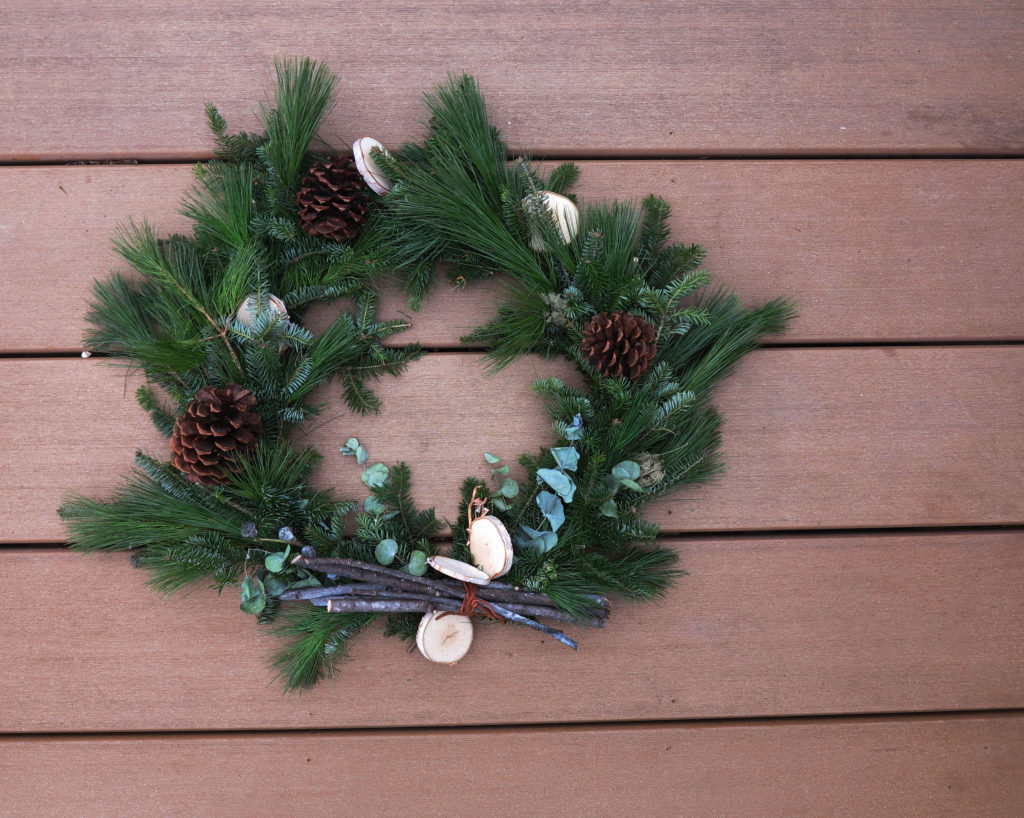
How to make a wreath. Easy DIY tutorial
If you have been wondering how to make a wreath without the stress, you are in the right place. This simple DIY tutorial breaks down the process into ” easy peasy steps!” Wether you are using fresh greenry or faux florals, I encourgage you to customize your design. There is no right way to craft, all you need to do is grab your supplies, let your imagination lead the way and enjoy the process.
*some links in this post may be affiliate links.
Supplies for making a wreath
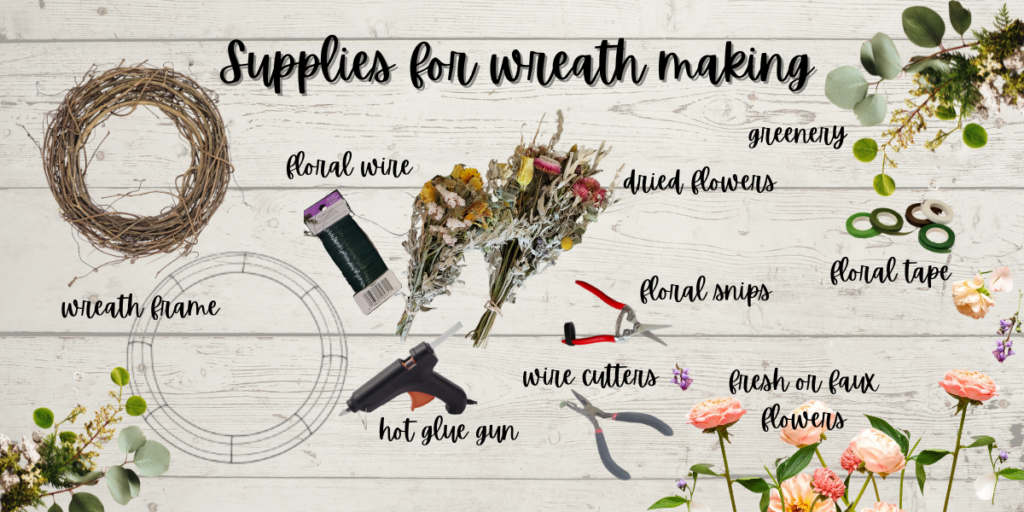
- wreath form: ( grapevine, wire or straw)
- floral wire : green or brown
- hammer : used to flatten the ends of fresh greenery
- pliers: for cutting wire
- fresh greens: pine cones, birch log if making a winter wreath
- greenery: a variety of textures work best
- various dried flowers, fresh flowers or faux flowers
- hot glue gun: for final touch ups and securing loose ends
- floral snips: for cutting fresh flowers and greenery
How to make a wreath
Step 1: Prep Your Stems
Before you start attaching anything, use your floral snips to trim your greenery and flowers into manageable pieces. Aim for stems about 4–6 inches long. If using fresh flowers clear the leaves off the bottom inch of each stem so you have a “clean” handle to wrap the wire around.
Step 2: Create Your First “Bunch”
Gather a small mix of greenery and one or two focal flowers into a tiny bouquet (a “bunch”). Hold them together so the heights are slightly staggered for a natural look. Wrap the bottom of the bundle with floral wire. Once around and twist ends of wire together and tuck behind.
Step 3: Secure to the Form
Place your first bunch against the wreath form.
-
Take your floral wire and wrap it tightly around the stems and the form at least three times.
-
Pro Tip: Don’t cut the wire! Keep it attached to the paddle/spool for the entire process to maintain constant tension.
Step 4: Layer and Repeat
Create a second bunch. Place it over the stems of the first bunch, overlapping them so the new greenery hides the wire you just wrapped.
-
Wrap the wire around this new bunch and the form.
-
Continue this “shingling” method all the way around the circle.
Step 5: The Final Connection
When you reach the starting point, tuck the stems of your last bunch under the heads of your very first bunch. This hides the final wire wrap and creates a seamless loop. Cut the wire with your wire cutters and twist it into the back of the form to secure it.
Step 6: Fill the Gaps & Finish
Hold your wreath up or hang it on a wall to check for any “bald” spots.
-
If you see a hole, use your to dab a bit of glue onto a stray flower or leaf and tuck it directly into the gap.
-
This is the best time to add your “flare”—like a small accent flower or a sprig of berries—to ensure the wreath looks full from every angle.
Quick Tip: If your wreath feels a bit “flat,” gently ruffle the greenery with your fingers to add dimension before the glue sets!

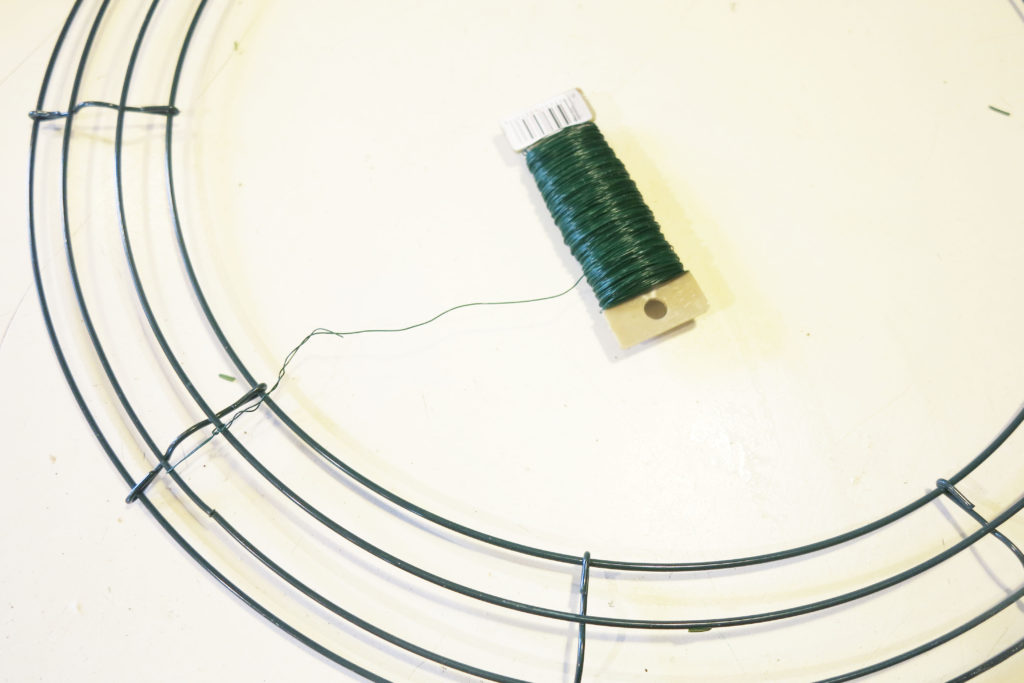
Pick a starting point on your wreath form and attach the floral wire. You do this by pulling a small section of the wire through the frame and wrapping the end around the frame several times.
Step 5
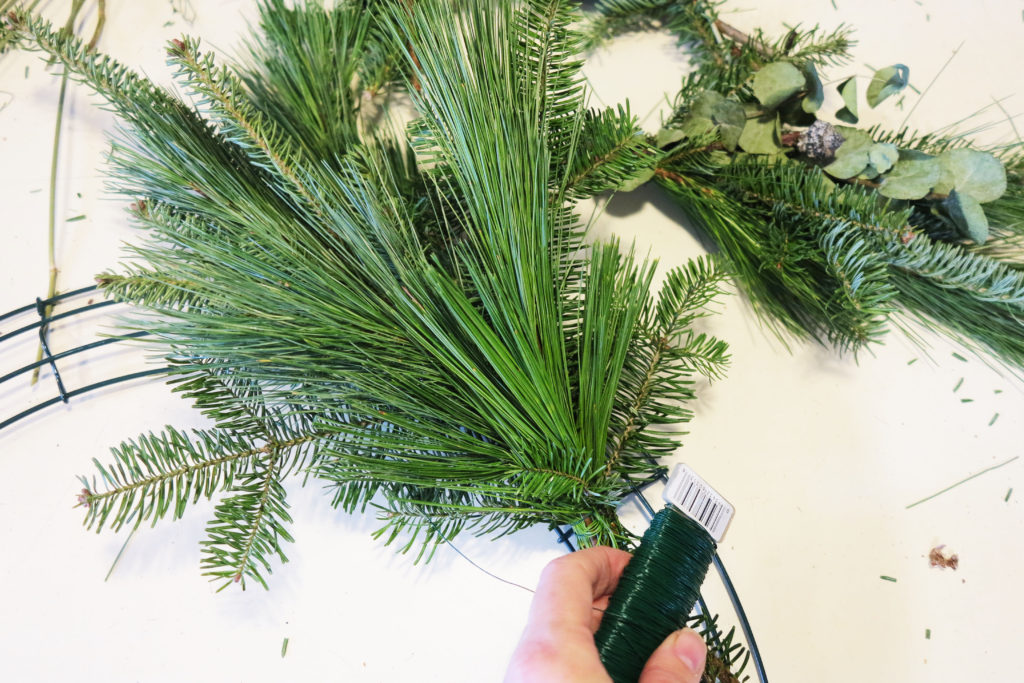
Lay out your bundles on your form. Play around with it until you find the design that you like.
Lay your first bundle down on your frame and wrap the floral wire around the bottom of the bundle. Pull tight. Wrap the wire around the form at least twice.
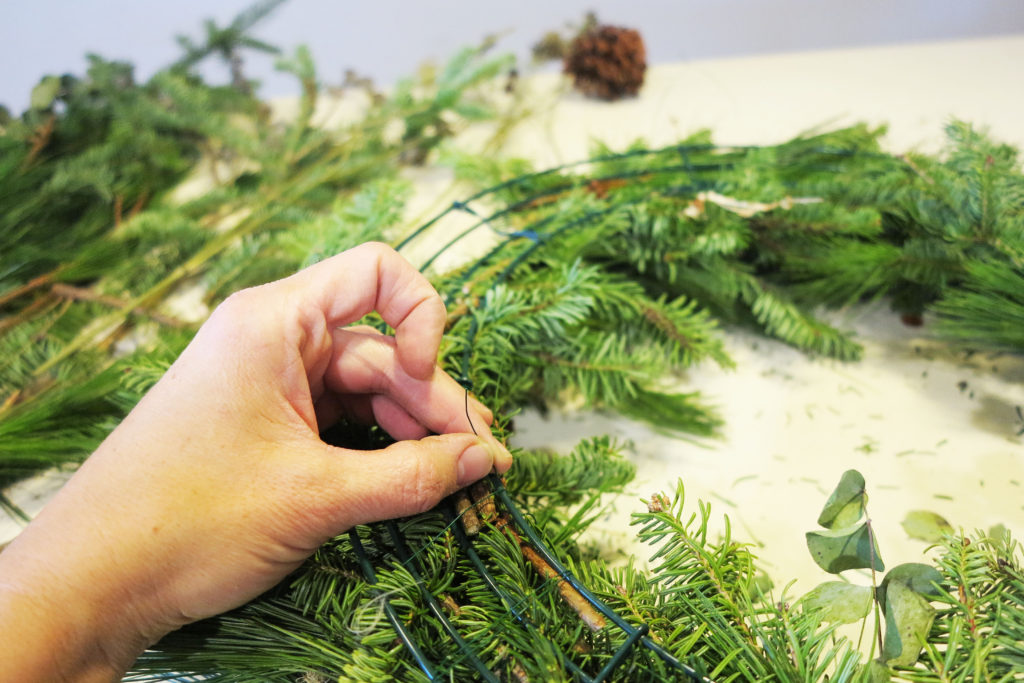
Layer your next bundle over the bottom of the first bundle laid. Again, move it to a position that you like. Do the same thing, wrap the wire around the bottom of the bundle and pull tight.
Continue this until the form is full.
Step 6
After you have secured your last bundle, bring the wire to the back of the wreath. Cut the wire leaving 8″. Wrap the extra wire around the wire of the form pulling tight. Wrap until there is no wire left.
Step 7
Mist wreath with water and hang on your door or porch wall. psst. Let your friends know that you made this. They will be awwed!!
Step 8
Lightly spray wreath with water to keep greens fresh. A fresh cut wreath will last about 3-4 weeks if misted and kept out of direct sunlight. If you used faux greenery your wreath will last for a few years before needs to be freshened up.
This is another wreath tutorial that you will like.
Here are a few of my favorite wreaths
Eucalyptus wreaths they smell so good!
This one is just flat out gorgeous!
*If an affliate link is clicked on and a purchase is made, I may earn a small commission.